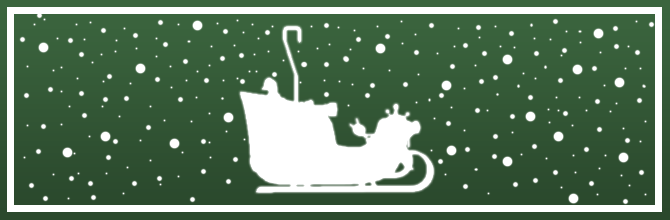
With Your Nose So Bright
Ho ho ho! First of all, merry christmas, happy new year and ‘insert other seasonally appropriate greetings’ – I hope that anyone reading this is having a good start to 2015, and enjoyed the holiday period.
December is traditionally quite a full month and around here is no exception – with all the celebrations, gift giving and family festivities it’s a pretty busy time. In a moment of insanity, I opted to make December 2014 even more hectic by entering another Unity Community Art Contest – Was this a bad idea? Or did I really know what I was doing?
This is the place to find out.
The theme for the month was ‘The Christmas Ornament’ and if you received nothing but a hearty handshake, or some petrol station chocolates from me this year, perhaps this blog will help to explain why!
The Missing Month
The astute of you may be thinking ‘Wait, it’s been more than 1 month since you won the halloween contest!’ – and if that’s you, then you’re correct – it has been more than 1 month! So what happened to November? Wasn’t there a contest? Didn’t I enter?
Well, November did exist. There was indeed a November contest. The theme for the month was ‘The Magical Crate’, and I did indeed enter it – but that’s where the good news ends.
In a sad turn of events, other demands on my time made the month disappear, and with little progress after 2 weeks, I opted to drop out of the running. In the end the contest was won by Frogames and his magical crate – which you can check out here. It’s a great concept and he produced a great model, so congrats to him and boo to me for not finishing!
You can see the start of my entry in the relevant contest thread, but to sum it up – my plan was to create a crate used to imprison a dark / evil / mysterious energy, suspended by chains from 4 magical pillars and sealed away from the world. The plan was to also have said energy seeping from a damaged part of the crate, wrapping itself around the chains, and pulling energetically to break free. The plan failed.
My crate idea was / is a cool concept, and I may still use at some point. Considering it was to be made from wood, metal and stone, it might be a good chance to practice the basics with some more hand painted texturing!
Now, lets get back to talking about christmassy stuff and the entry I did actually finish.
Idea Time
As with my previous entry, one of my personal goals for these contests is to try and push myself to do something different. It’s not just an opportunity to make something fun, and win something shiny, but a chance to practice and refine techniques, and to challenge myself to make better artwork. This month was no exception.
A change to the rules for this month meant that there was a 5000 vertex limit on each entry. Rather than see this as a problem, I saw it as an opportunity – I would practice my high poly / low poly workflow! Since I hadn’t done anything like this before, now seemed like a good time to try it, as well as experiment with generated normal maps, and play with real time lighting in Sketchfab. With my entire turtle island using just over 5000 vertices – 10% of the budget for that month – I’m no stranger to working with small numbers. So this should be easy… right?
Now that I’d figured out my personal aims for the contest, there was just one thing missing – something to make! There are a million and one ideas that spring to mind when you mention Christmas Ornaments, but something so obvious wouldn’t work for me. I needed to be able to put my own stamp on it, and since this is a Unity contest, it only feels right that anything I make is at least slightly game-related. So it has to be: Christmas-y, Game-ish and not-so-obvious. Well that’s easy – a Steampunk Santa Sleigh!
What? That wasn’t an obvious conclusion to everyone else?? Well it was to me!
In reality I did have several ideas, but found this one most appealing for 2 reasons: the idea of refurbishing something old (sleigh) with something newer (steampunk tech stuff), and getting to actually model some steampunk stuff! Over the years I’ve played a lot a games that feature steampunk stuff in one way or another – and now I get to do some!
Steampunk is actually quite a wide visual style, ranging from the scrappy and industrial, to the polished and mechanical – so there’s a LOT of room for strange and wonderful design features. This seemed like a perfect fit for something that carries a magical fat bloke in red pyjamas, and made my Sleigh idea the obvious choice. With the idea settled on, I began researching Sleigh designs (there’s a lot of possibilities) and steampunk technology (there’s a LOT of possibilities), and pulling together ideas for what features the sleigh would have.
After some back and forth, I finally settled on a square-ish Sleigh, with a shelf area at the back and a comfy leather seat – Santa dresses a bit like a pimp, he would definitely have leather seats. I then decided on the following steampunk features:
- Engines – Reindeer are extinct in the future. Didn’t anyone tell you? Going to need to chunky engines to get this bucket of bolts in the air.
- Headlights – It’s dark at night and I’m fairly certain Santa wouldn’t want to get pulled over for driving without these. Since there’s no Rodolph, a red bulb is also a must.
- Present Delivery System – How does Santa get all those presents onto his Sleigh? Simple. Shrink ray. This is the de-shrinking version.
- Coal Cannon – Introducing the 0E-B01 coal cannon1. Used to deliver black lumps of karmic morality (otherwise know as coal) at 600 kph. Bad children beware.
2 Models Enter, 1 Model Leaves
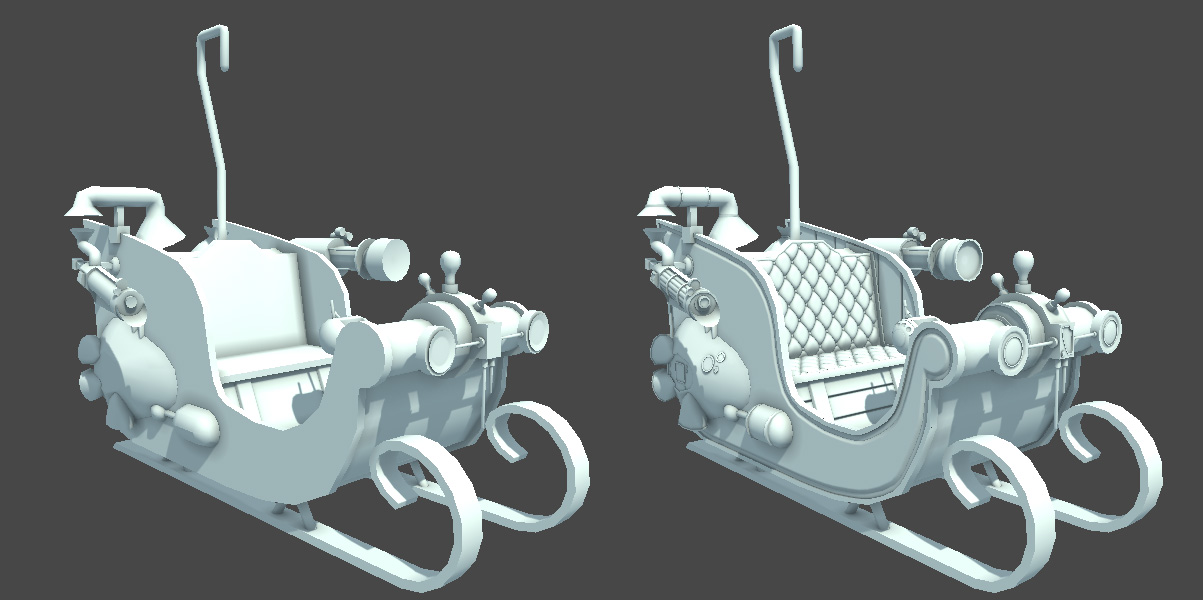
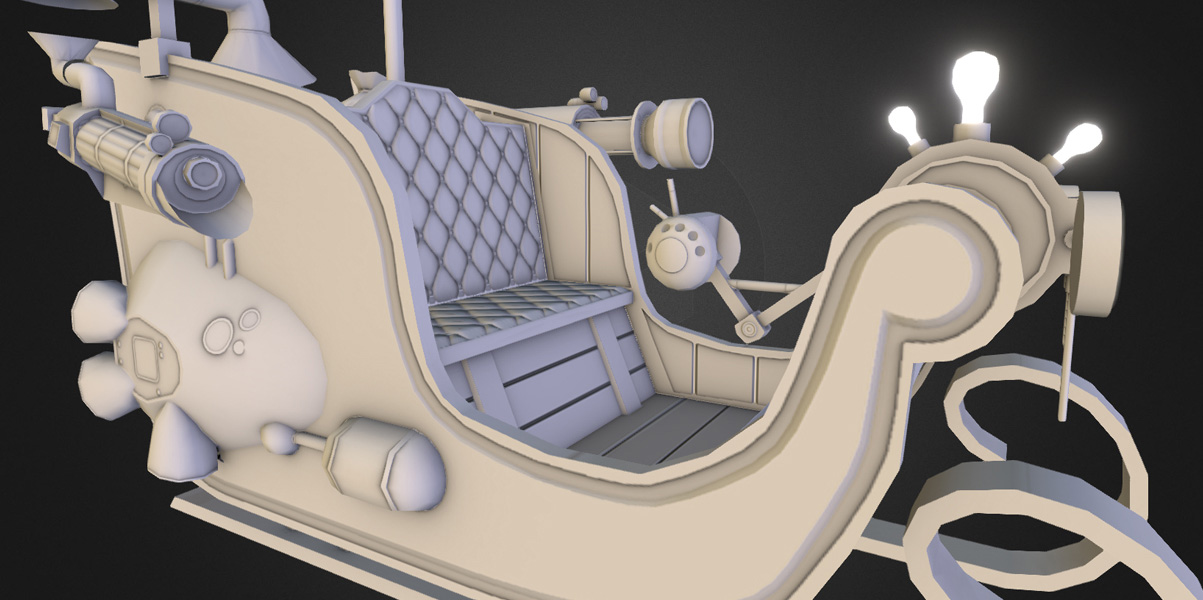
With the features decided on, I began work on modelling. Since there was a vertex limit on this challenge I opted to work between the high and low poly version to keep a close eye on my vert count. I started by creating what would be low poly version of the Sleigh – Sleighs have a lot of rounded / curved surfaces so I wanted to make sure I spent enough verts to get a good shape to work with. Any other details on the body of the Sleigh would come from the Normal map.

Honest, it IS a Sleigh…
Once I was happy with this, I duplicated my model and moved onto detailing it, adding carving to the outside and planking to the inside to give it a good structural feel. In the end I added a few more simple beams to the low and high poly versions to finish of the structural work. The runners where added next, extending and curving them til I had an acceptable smoothness – like the body of the Sleigh, these would be used for the low and high poly versions.
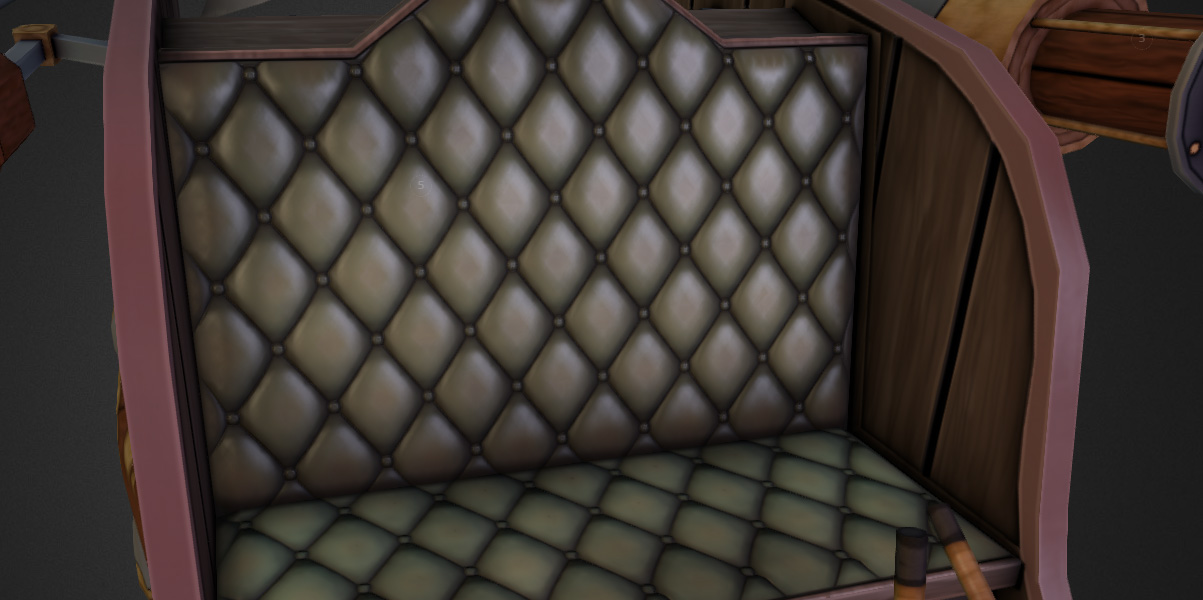
Next up was the seat. I had an idea of the diamond shaped pattern I wanted to use, and began work on a single diamond that I would tile to create the effect. It took several attempts to get the correct shape and smoothness, but once it was ready, I tiled it into a large area, added the buttons, then cropped it to the seat shape I had made for the low poly model. Tapering the edge to fit, the result came out as below. This completed the Sleigh part of the model – onto the steampunk!
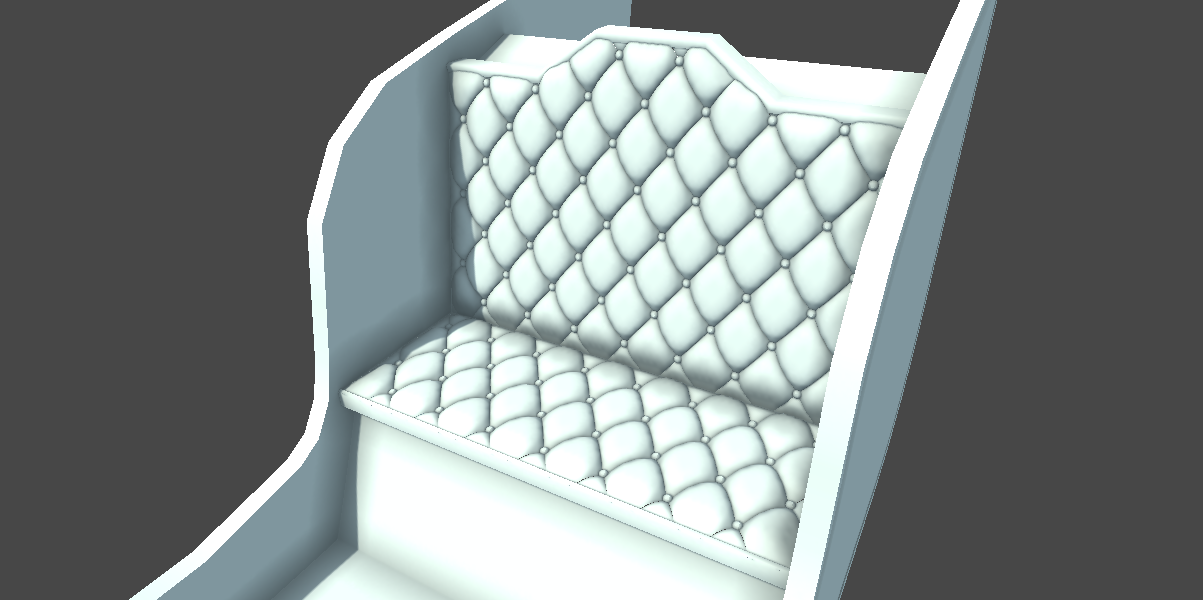
THE seat. Santa sits here.
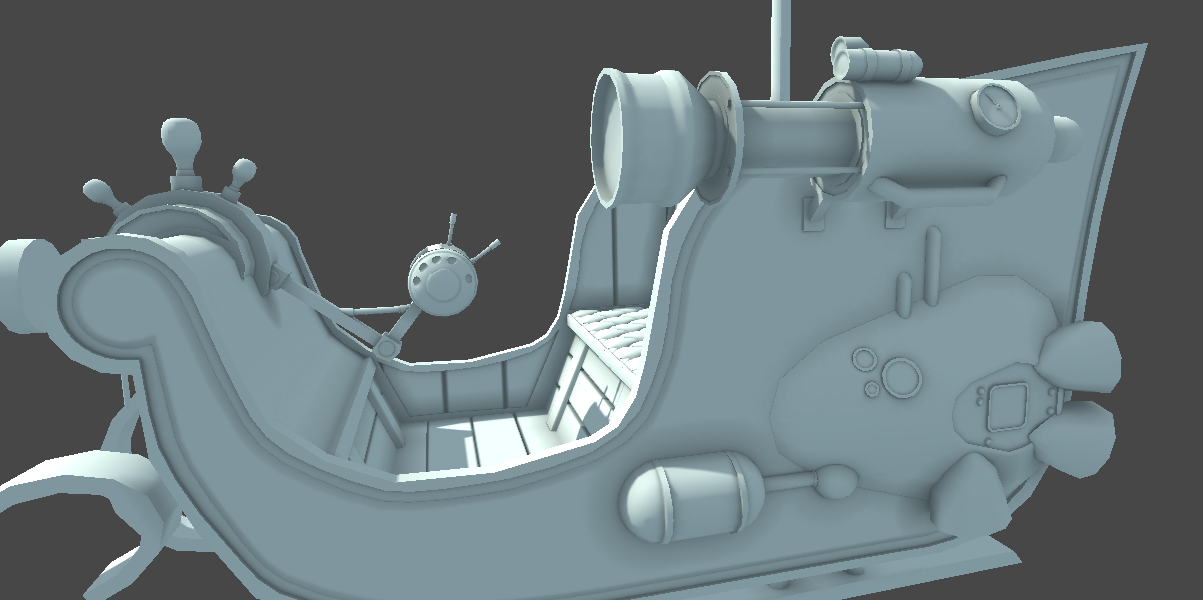
The simplest place to start the tech seemed to be from the front. This would be the part that everyone sees first, so it needed to be done right. Creating the curved form for the center of the lights, I opted to have them extend sideways rather than project forward from the Sleigh – I wanted my connects between the tech and Sleigh to be clean and obvious. To bring in the Rodolph theme, I added a partial mohawk shape of red lights to the central shape.

Now he can see where he’s going
After staring at it for a while, I felt the front area between the seat and the lights seemed a bit empty – something was missing – of course controls! I decided to keep the control system small, but placed it to mimic the shape of reigns hanging over from the front.
Next it was onto the engines – it took me several attempts to get these right. Initially I wanted something that looked big and mechanical, but as I struggled to figure out a shape that flowed well – the only things that would work where far over the budget I’d set for this section. With most of my contingency already used up with the addition of the controls, I scrapped the engines and created something more contained – hoping that the texturing would make sure they didn’t seem out of place.
I had decided that each of the guns would attach to 1 side of the Sleigh, feeding through to the back where it would connect to something. For the left side it would be the Present Gun connecting to a sack. With the vert budget running tight, I modelled the low poly version with as much detail as I wanted, then added more to the high poly version where I hoped the normal maps would improve it.
This is where the presents come out
On the right side, the Coal Gun would be attached and connected to a coal bucket in the back. I had hoped that there would be enough verts left to add some kind of machinery above the bucket to move the ‘ammo’ – but with the budget all but gone, I had to settle for some impossible pipes. It works by suction. REALLY strong suction. Honest.

And from the right side
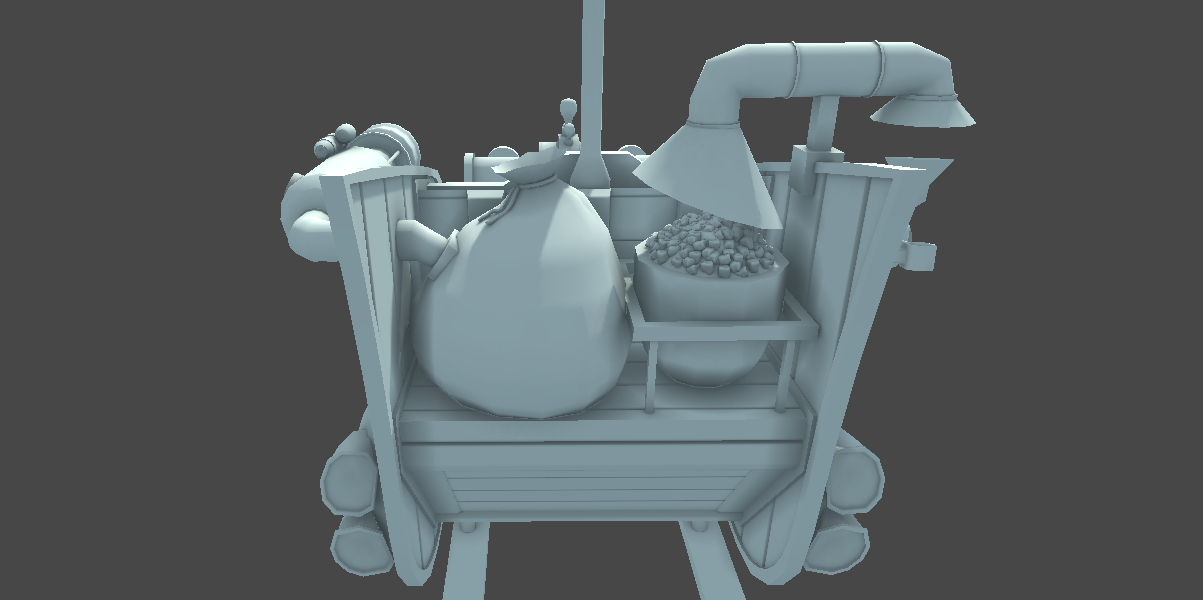
From behind – Don’t mix these 2 up
With the model coming in just under the 5000 vertex budget, I added some simple geometry to do a glow for the headlights and moved onto sorting out my UV maps.
Not-so-identical Twins
Initially I had planned to fit the Sleigh onto 1 texture, and the steampunk tech onto another. However this didn’t take into account just how much surface area there is in all those small / curved and steampunky shapes. To ensure I had enough space to keep the texture looking crisp, I opted to spread the tech onto 2 textures – right gun and headlights on 1, left gun and engines on the other.
This was a good call.
Lights, Camera… Angles?
Unlike my previous entry, this time I intended to use the real time lighting features in Sketchfab and not just bake everything into the diffuse. I did, however, decide that as well as baking normal maps for my high poly model, I would also do a quick AO bake and use this to enhance the shading on the diffuse. For both of these tasks I had to get to grips with xNormal (another first).
After a little bit of trial and error, I managed to get some nice normal maps together – although it turns out that there isn’t really a one-fit solution when it comes to baking normals. Settings that produce good results for one part of your model, can make a mess of another part – this is especially true when it comes to ray distances. In my case, what produced good results for the rest of the model, ‘capped’ too quickly in the deep recesses of the seat. This lead to me re-baking the seat on its own and copy pasting it in. As well as this, I had to do some manual tweaking to cleaning ‘projection bleeding’ on other parts of the model. Baking normal maps is definitely not as complex as it might sound, but expect to have to do a few fixes afterwards if you want to get things just right.
By contrast, baking the ambient occlusion required less corrections than my normal maps, but it did require a lot of time. SO much time. EONS of time! Ok, maybe not that much, but when your working against a deadline it sure feels like it. And again, the one area that required more attention was the seat. Even after multiple attempts at re-baking that area, I ended up having to touch it up by hand – covering up erroneous white pixels in the deepest recesses was annoying and slow, but it had to be done.
To test out my normal maps I decided to upload a version of the model to Sketchfab – this also gave me a chance to test out the final lighting options. After some tweaking of dials and sliding of sliders (Ok, SKetchfab doesn’t have any dials…), I found some settings I was happy with. You can checkout a screenshot of it below, or you view the full WIP model here. This upload was actually done with the rawr AO and normal maps before any editing was done, so you can see some of the issues I mentioned before (especially the seat!)
Bumpy, normaly, lighty, goodness
Now it was time to add some colour – but before moving on to painting, I decided add a little creative flavour to my lighting. Using the lightmapper in Unity I did a quick bake of my scene with 3 point lights emitting a red glow onto the sleigh from the ‘nose’ lights.
This would be used, like the AO map, to add more depth to my diffuse without influencing the real time lighting.
Painting by Numbers
To keep with my ‘contrasting’ theme, my texture would need 2 distinct looks – dull or pale tones for the old Sleigh, and a metallic or polished for the steampunk parts.
After cleaning up any errors in the AO I was using as a base (technically it would be on top as a multiply layer), I quickly went about and capped / covered any holes or projection errors and flatten that into my AO. If you’re not sure what I mean by projection errors here, an example would be the AO for the side of the Sleigh actually featuring parts of engines in it. This could have been solved by more model splitting during the baking process, but since I actually wanted black bordering where my tech and Sleigh intersected, leaving the errors in made it easier to see where the intersections happened. This technique wouldn’t work for every style, but for the look I wanted it seemed to fit well. This had the nice side benefit of showing me that anything left behind would be visible and need painting – an indication of just how much work I had left to do!
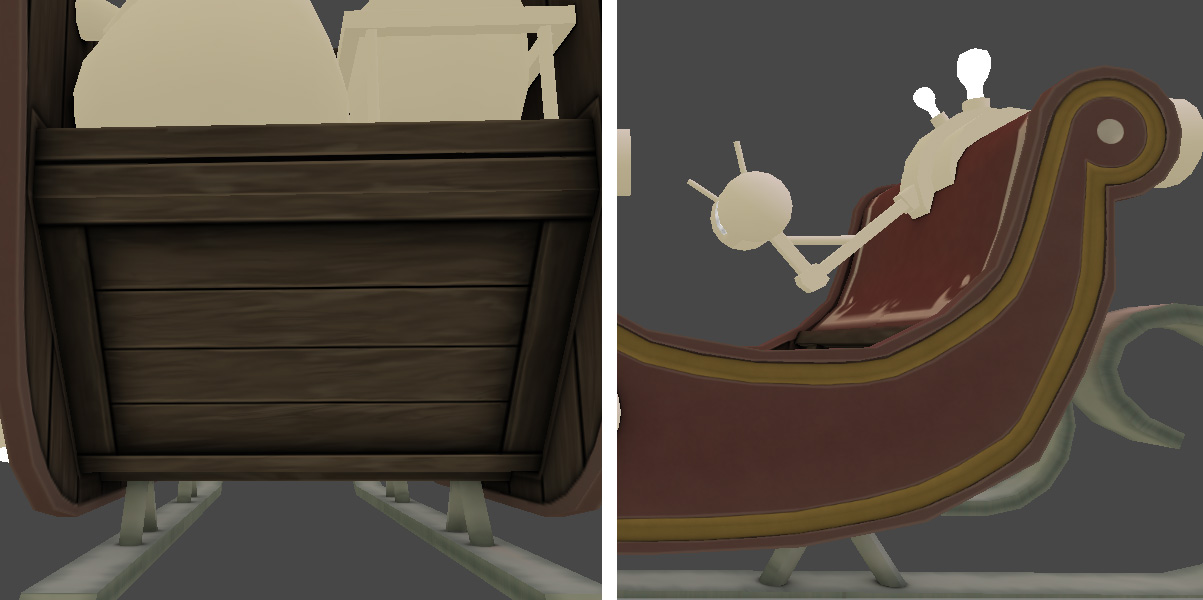
Now that the prep work was done, I turned my attention to the Sleigh itself. The majority of the texture would be plain wood, with a faded paint job on the outside, and worn silvery runners underneath. Being a little unhappy with my wood texturing from my previous entry, I put in a little practice and came up with a method that gave much better results – and was quite fast to apply to whole Sleigh. Bonus points to me. The paint on the outside I left quite plain, just adding some variation and fading, then detailing it with a white pattern. This patterning actually wasn’t planned at all, but was just something that happened when I attempted to break up the larger red spaces a little. It felt quite christmassy despite being just a few white lines and circles – so I kept it.
A little DIY in action
The other part of the Sleigh that needed painting was the seat. After the amount of extra attention this had required at pretty much every stage so far, it HAD to look good. Luckily the corrected AO and the bump map were already doing a lot for the look, and after adding a base colour and some shading to the shapes, the end result looked quite pleasing. I enhanced the look further by darkening / lightening the base to create wear, then added a colourised version of the AO as a final touch to make the colouring seem richer.
Leather is a quite a complex material to draw, especially in the way it wears and ages, but I’m pretty pleased with how my first attempt came out.
Come take a seat!
The remainder of the model was steampunk tech – with a few other random bits mixed in. After tackling a few of the simpler parts such as the coal, naughty list and sack, I quickly threw 3 different base colours down and covered the rest of the model – these would represent Steel, Brass and a Rich Veneer / Polished Wood. The fast paint let me balance the materials in proportion to each other, and after a few tweaks, I was happy and moved onto detailing them.
The technique from the previous wood I had made carried over, and the Veneer moved very quickly to completion. Throughout the texturing process I had been producing sections of the specular map, and for this section I opted to keep it very light to give a highly polished look in my lighting – this would contrast well against the dull wood of the Sleigh. The steel work was again quite fast to produce at first, but as I started to feel pressed for time, I was forced to move on before I was totally happy with it. My brass work suffered from the same lack of time, and too soon I was forced to settle with a look I wasn’t entirely happy with.

Tech stuff – Pew pew… Vroom vroom!
With the steampunk tech being split into 2 separate textures, and having already produced all the different types of materials on the 1st texture, it was a simple matter to reproduce my styles on the 2nd texture. Thankfully this was much faster than the 1st texture, and all my worries about not making it melted away…
All Sketched Out
In what is becoming a horrific Unity Contest tradition, I declared my texturing finished a few hours before the deadline and went to join the rest of the world celebrating the death of 2014.
Here’s the final version (or here):
There where a few moments midway through the last day that I didn’t think I would make it. But after finding my 2nd, 3rd and 4th wind, I was very happy to have crossed the finish line. Another job well done.
Good Cat
Like last time, I’m happy with the overall result and of course I have my favourite parts (the nice list):
- Concept – It might be egotistical, but I’m again happy with my concept. It gave me a lot of creative room and is very different to everyone else (very me).
- The Seat – This came out so well. SO well. It did require a LOT of work, especially at the model and AO phases, but I think it really paid off.
- Wood – With my wood issues last time, my revised wood feels like a revelation. Just check out the wood panel at the back of the Sleigh! Looking forward to working on this more and improving it further.
- Red Glow – I’m not sure what made me decide to do this, but I’m glad I did. It’s subtle, but it really brings the piece to life.
- Specular Map – For something that is basically my AO map, multiplying over desaturated / contrasted versions of my base texture, this came out really well.
- The List – One of my fav little details. What? You didn’t spot the naughty / nice list on the control panel?
- Sack – One of my other fav little details. Glad I didn’t paint it red or green, it’s part of the steampunk not the Sleigh!
Bad Dog
This is the part of the blog where I tell myself I suck, pull my own hair, slap myself in the face and generally tell myself I’m a very bad person! Ok, it’s not quite that bad, but here’s my naughty list for this month:
- Metals – Time crunched me on these and it shows, the large brass sections sometimes look wooden! They also suffered from not being fully one style. Not hand painted. Not realistic. Not happy.
- Middle Ground Style – The final look is good, but not quite as I’d imagined it. The steampunk could have been more steamy. The Sleigh more old and beat up.
- More Detail – Chipped Paint? Scratches?
- TIME – I would like to enter one of these contests where I am NOT texturing 3 hours before the deadline. I know this may never happen, but wishful thinking, right? I think artists will always use as much time as they are given…
- Shiny – I’ve change my mind, the Veneer is too shiny!
- Brass – Hate it so much I have to say it twice.
Conclusions
Anyone still reading? Yeah, that turned into a bit of a long post – I’m getting flashbacks my 40,000 word dissertation here. Apologies for waffling on this time, but thanks for sticking with it!
I Learned a lot from this one, but the big gains where high / low poly workflow and practice with xNormal – there’s a bunch of little things I’ll know for next time I do these 2 things and that is invaluable.
My final entry matches my concept quite well, and ignoring the few parts I’m not satisfied with, the end result looks pretty damn good in Sketchfab. The Private options from my pro sub also came in very handy – getting to test out my lighting without feeling like I was naked on stage was a very nice experience!
Just remind me NOT to do something so big during a holiday period next time…
Update: Results are in, congratulations to the winners Bobbert, Essimoon and Dox (my fav).
- Naughty Boy – get it? [↩]