Playing with Fire
Well here we are again – another month, another Unity Community Art Contest – and another blog covering the ‘When, How, Who, What and Why’ of my entry. I’m sure there’s supposed to be another ‘W’ word in that list, but I can’t think where I’ve placed it…
Ok, that was bad. Sorry!
This months theme was ‘The Bridge’ – a fairly wide theme with lots of room to come up with an interesting idea – and as usual, this blog covers my entry and the though process behind it. Enjoy!
Thought Powered Reaction
There were a LOT of ideas bouncing around in my head for this months theme, and at first, I had a hard time focusing on which would be the best, or which I could do the most with. No point having a great idea if you can’t pull it off, right?
Now, a bridge might seem like the most mundane of things, but when you start thinking about the purpose of a bridge – where it is going and why – the possibilities become almost endless. You could take pretty much any idea and apply a bridge to it in some way, and this was the problem I was having. I needed something else to narrow things down.
In previous months, I’ve always tried to set myself some kind of challenge or push myself in some different way, and in my minefield of ideas this was my salvation. I picked something that I had deliberately stayed away from in previous contests, and something that I was probably subconsciously avoiding in my ideas for this one – Characters! Take that brain.
This immediately narrowed the field, and although there were still a few directions I wanted to go, I opted to go for the idea that lent itself best to the 5000 vertex limit, and that involved robots. It also seemed rather fun to me that instead of simply being a character on a bridge, the robot would be the bridge – and maybe for other robots! Ok, Robots are awesome.
With that nugget of inspiration my idea quickly took shape – a team of Search and Rescue robots, one of them forming a bridge to help the others get where they need to go. Idea done. Time to start throwing out some polys.
Hold that Pose
Since my idea needed at least 2 robot characters, that would be my first port of call for modelling. Having not done much character modelling before, I decided to steer clear of rigging and posing my characters through animation, but instead to simply model the parts separately and rotate the mechanical joints into place inside Unity.
This wouldn’t have worked with real people – another reason robots are better than humans. Humanity isn’t doing very well at the moment.
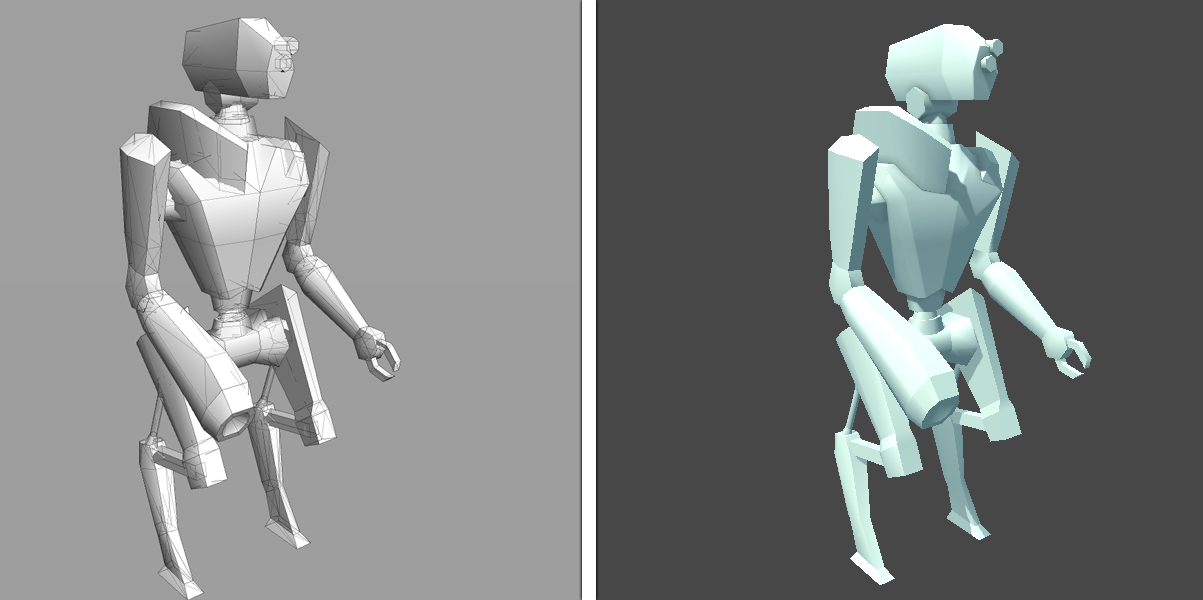
Mr Rescue robot and his handsomely-lit twin
I wanted the robot to be quite simple, but not too boxy – this lead to slightly rounded feel of the chest and head, as well as the curving across the outside of the limbs. I also opted for distinctly not-human legs and prayed that they wouldn’t be a pain to pose afterwards!
For the arms I decided that functional and simple would do, giving him one claw hand for grabbing stuff and a cutting torch for the other hand. This brought a nice bit of asymmetry to the model, and I carried that on with the heat / cutting shield on the shoulder above the torch.
Everything looked pretty good, and importantly, my robot was sitting at about 600 Verts – giving me plenty of budget for the rest of the piece. Using this as a base, I hashed out a rough allocation of the remaining Verts, decided I could afford 2 Rescue robots, and came up with the following plan including contingency for posing / effects:
- Rescue Robot x 2 – 1500 Verts (600 each + 300 cont)
- Search Robot – 1500 Verts (200 cont)
- Escape Pod – 1000 Verts (0 cont)
- Environment – 1000 Verts (0 cont)
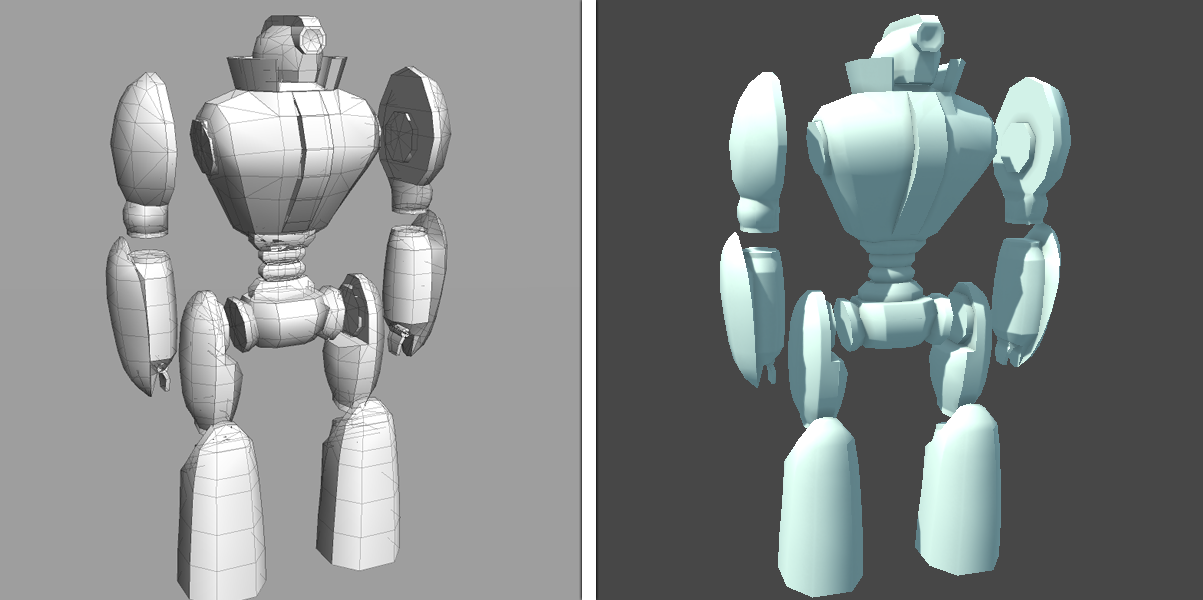
He definitely lifts… bro
With a good idea of how everything was going to be spent, I dived into modelling the second robot. Since this would be the ‘bridge’ character, I had some specific requirements on the styling of it: Strong legs; Wide arms / shoulders; Narrow waist and strong chest. The aim of this was to give a very bridge like silhouette once the robot was posed.
Keeping this in mind, I tried to match the style of the first robot without directly copying it, and ended up with the above design. The collar was added at the end to help keep the head ‘tucked in’ once his shoulders were up in the bridge pose. Since the pose for this robot was so crucial to the scene, I opted to leave out the joint geometry and add it in afterwards to give myself more freedom of movement. In hindsight, this was a VERY good call.
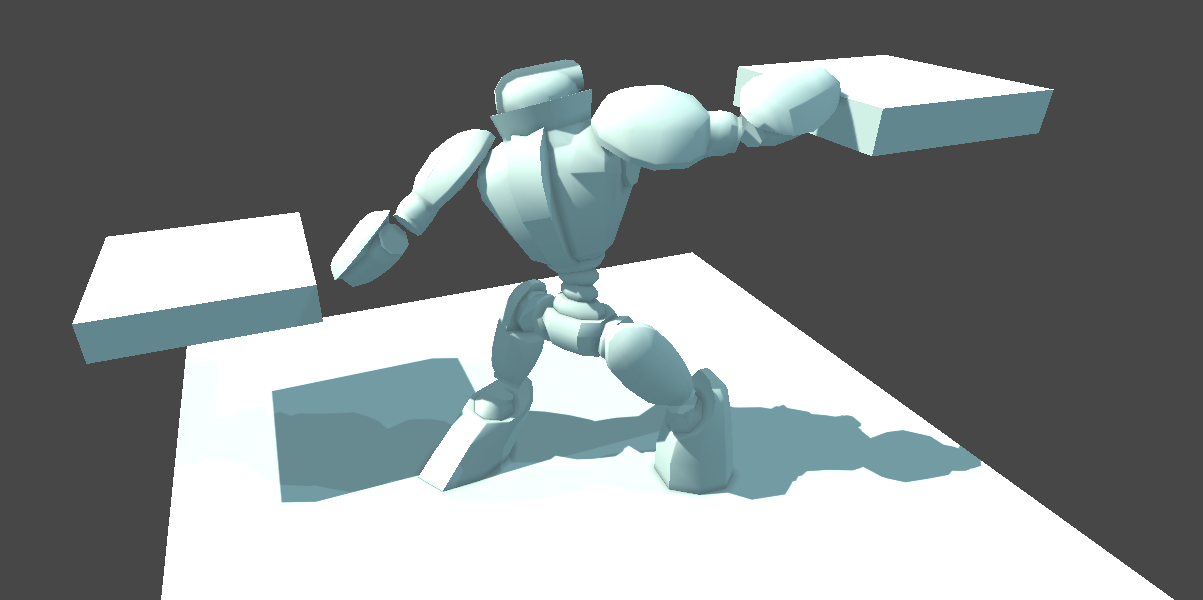
Striking a pose
Happy with the looks of robot No. 2, I went straight for the difficult job of posing him. After bringing him into Unity, I made a simple hierarchy of GameObjects and organised the pieces of robot accordingly. This would let me rotate entire regions easily, for example upper body or left arm, in much the same way a skeletal Rig works.
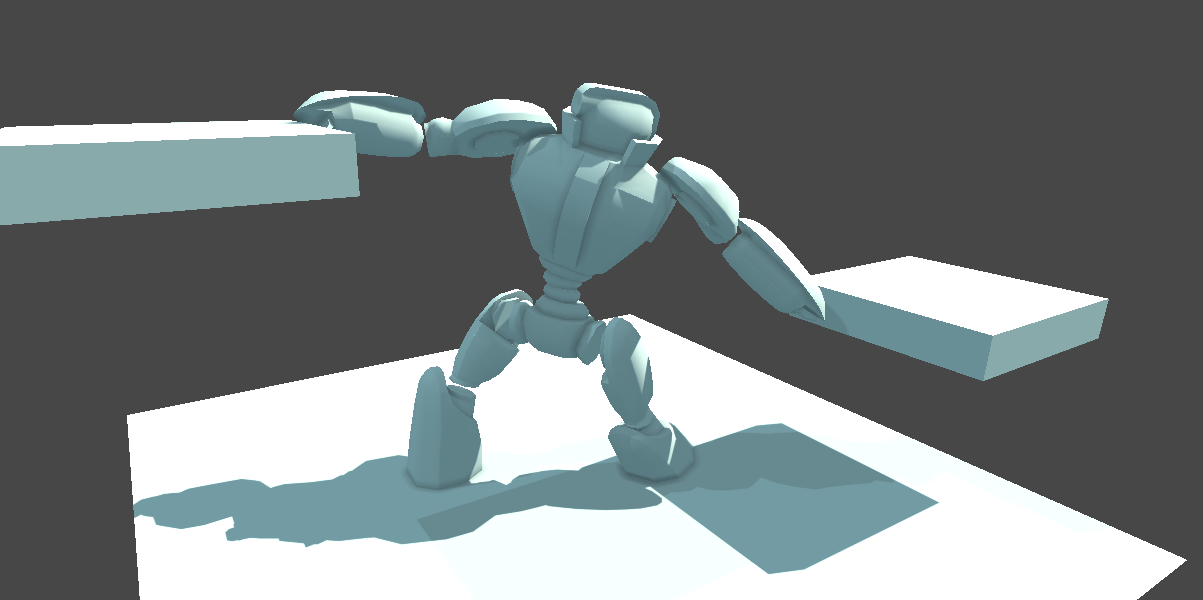
Just hold it for a little longer
With the setup done, I added a few boxes for reference and started twisting my sections into place, focusing on the line across the arms primarily, then adjusting the body underneath to support it. The goal here was to have a strong and almost flat surface across the top, with arch like shapes forming under the arms and between the legs. The end result would hopefully mimic the style of tiered arches you may find on old railway or aqueduct bridges.
The observant amongst you may have noticed that Search has no feet. This wasn’t an oopsie moment, but in fact a choice – having him ankle deep in water / lava would make it easier to pose the legs, as well as provide context for why a bridge was needed in the first place.
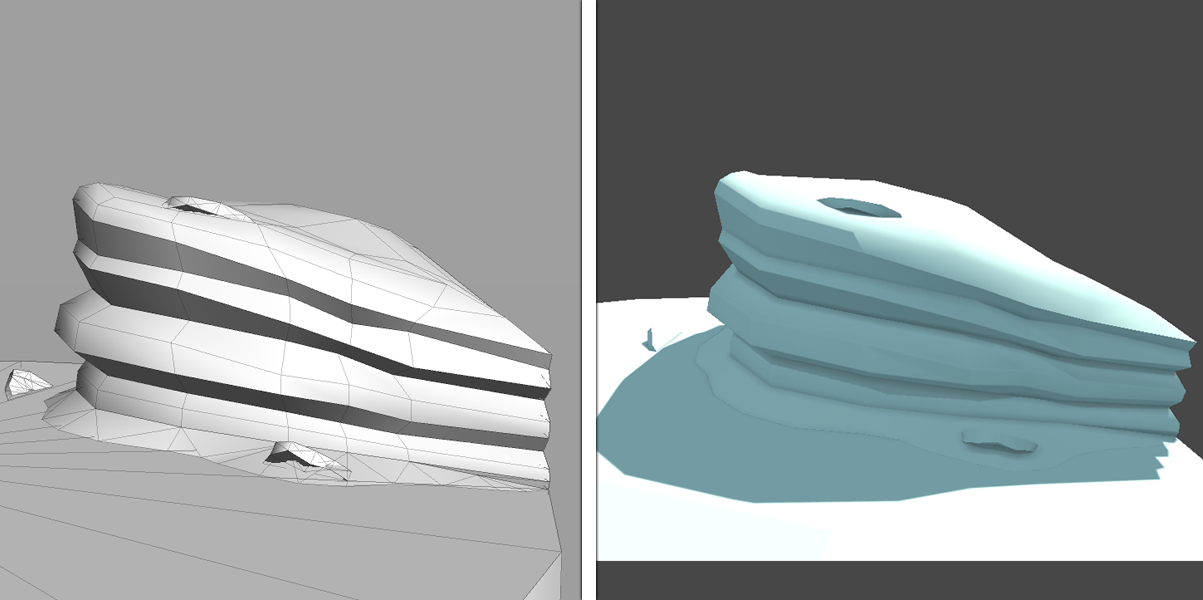
Land Ho!
The important pose was now done, so I exported a copy of Search back out of Unity and got to work on the environment. Wanting to add to the danger of the scene, I decided that the floor would be lava, and the ground either side would be a dark and rocky terrain. This would be a nice contrast against the robots, and provide an opportunity for some dramatic firey under lighting.
Looking big and bridgey
With the environment done, I brought it back into Unity, and imported a couple of Rescue robots to check my scale. The scale felt good and all the models where under the budgets I’d set earlier. I love it when a plan comes together!
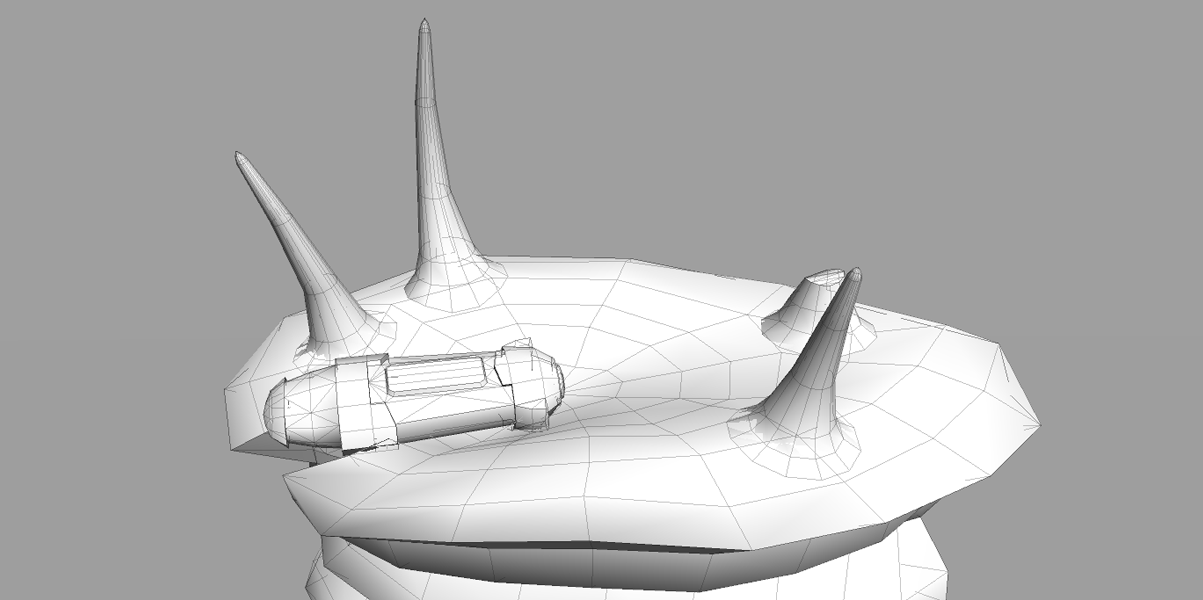
Not a good place to park
Now it was time to add a reason for the bridge – a crashed escape pod. Initially I though to do something that resembled the bell-shaped Nasa return capsules, and I liked the idea of linking a fantasy scene back to something people could recognize and relate to. Sadly, the shape of pod gave me trouble when it came to positioning it dramatically against the landscape. To make it look right in the impact zone, I would have had to significantly alter the terrain, and unwilling to spend time on that at this stage, I opted to redesign the pod.
Knowing that the impact would be quite shallow, I chose to do something long and almost coffin like. Happy with the new direction, I tweaked the terrain to show the impact, cracking the cliff wall and adding some rock columns to make the area around the pod look more dangerous. The other side of the bridge is a picnic zone by comparison!

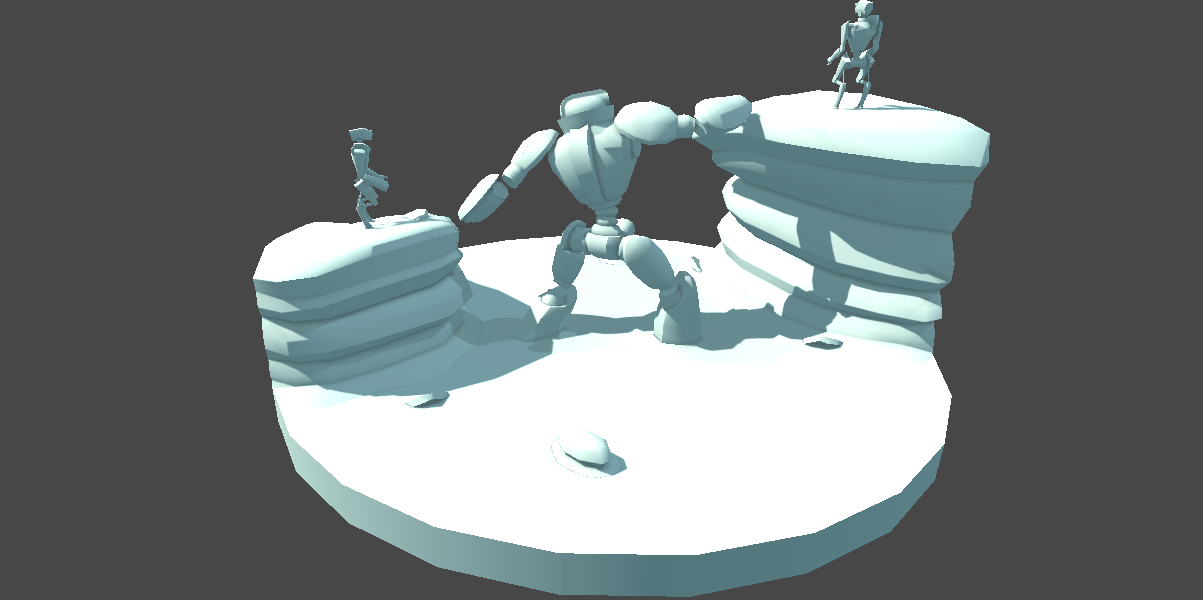
Men of action… wait, robots of action!
Adding a few simple material colours to help save my eyes from the sea of white I’d been staring at for days, I moved onto posing the Rescue robots. Using the same hierarchy trick from before I slowly rotated them into place, opting to pose them at either side of the ‘bridge’ to keep them contrasted against the landscape. I’m quite pleased with how well the running poses came out – it’s a real Baywatch moment.
I did have to make a few adjustments to the geometry at the joints to support these poses, but since I still had to add the joints for Search, it was simple to make these tweaks at the same time.
At this point, I took a look at my Vertex count and realised I was quite a bit of budget remained. Great news, I can add more stuff! So I did. That stuff took the shape of effects details for the torches and the robots eyes, as well as a new scouting drone, helping to co-ordinate the rescue effort. This new and invaluable member of our team would be called Eyes.
Polygon-ing done! Onto lighting.
Setting the World on Fire
As with my last entry, I had opted to merge real time and pre-baked lighting for this project. After a little bit of tweaking I settled on having a dark-ish environment colour, with strong lighting from the lava and a few additional detail lights.
With the lights in a good place, I did some exporting magic and merged the lighting into the textures. This can be an annoying process as exporting a lightmap with a mix of different light colours and shadows can be tricky to apply to a texture, but this isn’t the first time I’ve done this, so I was already aware of this issue.
To get around any potential blending problems, I actually re-baked and exported the lighting 4 times: Once with the main directional light, ambient light and AO; Once with just the lava light; Once with the torch lights; And once with spot light from the Drone. All except the first lightmap where exported against an entirely black scene.
This method meant that I could choose different blending modes for each light colour to make sure the end result was right. In this case it meant applying the 1st lightmap as a Multiply layer, and the other 3 in Screen mode. The results can be seen below:
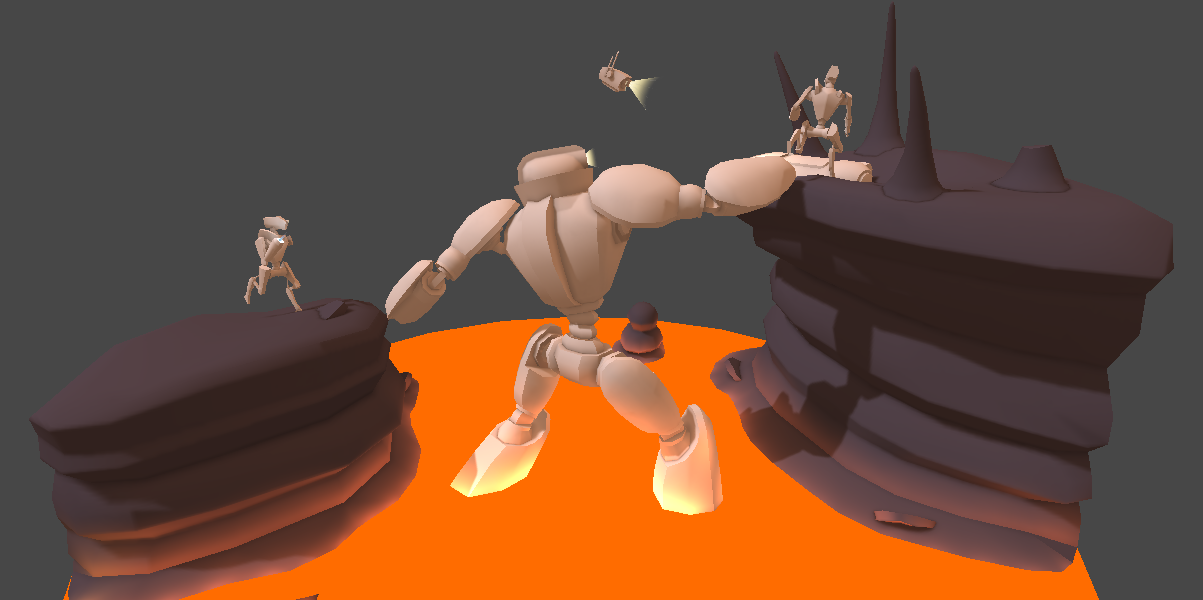
That lava looks HOT

From the other side, it still looks HOT
Happy with the lighting, the finish line was now in sight. Just the texturing remained.
Red Carpet Treatment
With not much time left in the contest (roughly 1.5 days), I started work on texturing my scene. The lighting was already adding a lot to some places, so I prioritised my remaining time on areas that needed more detail to actually work – primarily this meant the terrain and lava.
Since most of the land was exposed rock I got work creating a cracked and jagged texture for the cliff faces, and made sure to add significant damage to the impact site for the pod. To cover the rest of the exposed ground I created an ashy dirt texture. Getting the right look for the rock faces was probably the longest part of this process.
Next to recieve my attention was the lava. This was a fairly large part of the scene, so it needed to look right. I started with randomly spattering some black across the surface to figure out where I wanted crust, then used this as a mask to apply some of rock texture I’d made for the cliffs. For the lava itself, I simply painted some flow lines and darker patches and blended it all together in a soupy mess. This whole texture probably took me 15 minutes, and for the time spent, I’m amazed at how good it looks!
Now all that remained was the tech stuff – robots and pods! With time running out, I concentrated on breaking up the white surfaces with darker patches in the joints and some simple gradients to give the surfaces some variation. I finished this off with some line detailing, coloured sections and names. Lastly the legs of Search and the escape pod received some battle damage.
A Sketch in Time
So my Unity Contest tradition continued, and a few hours before the deadline I made my final tweaks and called it done. I should be annoyed at myself for working so late, however, this month is actually a short month and the contest only started on the 3rd. That’s almost 1 week shorter than the previous contests!
With that in mind, I’m choosing to count this month as an improvement in not-taking-as-long-as-possible-to-finish-something. Go me.
You can see the fruits of my labour below or here on Sketchfab:
Apples
Now it’s time to separate the good from the bad, and share my thoughts on what I like most about my entry:
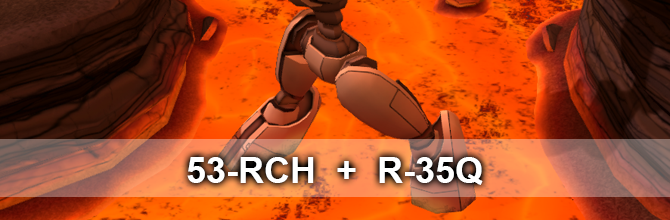
- The Names – I love the names of my robots (53-RCH, R-35Q and 3Y-35). For some reason they make me smile in the most geekish way… even the escape pod!
- Concept – I feel like I say this all the time, but again, I’m pleased with my concept. The contest theme was very open, yet I still feel like I did something not-so-obvious and a bit unique.
- The Lava – For something that was so quick to make and covers a fairly large part of the scene, my lava looks awesome. In fact, double awesome.
- Search Pose – It was part of the process I was dreading, which is why it feels so awesome that it came out well. The pose for Search came out great. Strong, heroic and… bridgey. It’s hard not to swoon.
Oranges
Of course, there have to be some parts of my work that are less-than-ok, so here’s my list what areas don’t quite do it for me this month:
- Missing Robot – There was another robot who was going to make up part of my Rescue team, and given that I came in under the Vert budget, I could have squeezed him in. His name, 34-R5, was awesome too!
- Robot Details – The lighting helps make up for it, but the white metallic surfaces are a bit under-textured. This was mainly due to lack of time. Why can’t February have 31 days?!?
- Lava Light – The lava is awesome. The way the light from the lava looks against some of the scene… less than awesome. Now that I’ve seen it as wrong, I can’t unsee it!
- Footprints – I was going to add some dirty footprints across the arms of Search to show the path the Rescue robot had taken, but I was worried that they wouldn’t read well at a distance, So i didn’t. I regret this.
Conclusions
I’m very happy with how things came out this month. It felt good to go back to doing a ‘diorama’ style piece – I like being able to work on a ‘finished’ scene and give it lots of atmosphere / character. When I compare this months work to my entry for the Xmas Contest, the later just feels a bit like a model floating in space – there’s no real context to bring it alive!
Also working with characters was also quite interesting. It was challenging at times, but also quite rewarding with how they fit into the scene and really sell what’s happening. It could be something I do again – although posing more organic characters could quickly eat up a lot of time, so it’s something I’ll have to be cautious about.
I guess that wraps things up for now – all in all another fun piece of work.
Thanks for reading!
Update: Seems that I came 3rd for this month – not too bad! Congrats to Essimoon on 1st place and Revan on 2nd.